

Fail2Ban
fail2ban is an intrusion prevention system that monitors log files for multiple failed authentications and blocks the intruder's IP address for a specified period of time. It is an important security tool, designed to protect your server from brute-force attacks and other types of malicious activity. In this article, I will show you how to install and configure it, first manually and then as usual using one of my scripts.
First install fail2ban package.
sudo apt install -y fail2ban
Check if fail2ban is enabled to start automatically after reboot.
sudo systemctl is-enabled fail2ban
If fail2ban is disabled, enable it.
sudo systemctl enable fail2ban
By default, fail2ban ships with a jail.conf file (/etc/fail2ban/jail.conf) with a lot of predefined jails. However, changes made to that file will not persist after updates, so you will have to create a new file /etc/fail2ban/jail.local.
sudo nano /etc/fail2ban/jail.local
Add the following lines inside it:
[DEFAULT]
ignoreip = 127.0.0.1/8 XXX.XXX.XXX.XXX
findtime = 1d
bantime = 1d
maxretry = 1
banaction = iptables-allports[blocktype=DROP]
[sshd]
enabled = true
backend = systemd
mode = aggressive
filter = sshd[mode=aggressive]
[ssh-trap]
enabled = true
backend = systemd
filter = ssh-trap
[over-ping-limit]
enabled = true
backend = systemd
filter = over-ping-limit
[over-syn-limit]
enabled = true
backend = systemd
filter = over-syn-limit
[softether-vpn-client]
enabled = true
logpath = /usr/local/softether/security_log/*/sec*.log
filter = softether-vpn-client
[softether-vpn-admin]
enabled = true
logpath = /usr/local/softether/server_log/vpn*.log
filter = softether-vpn-admin
[recidive]
enabled = true
findtime = 1w
maxretry = 2
banaction = iptables-allports[blocktype=DROP]
Press Ctrl x, then y and Enter to save the file.
[DEFAULT] section is for default settings that will apply to all jails. You can for example define IP addresses to be ignored (failed attempts from these IP addresses will not count). Replace XXX.XXX.XXX.XXX with your private IP address. You can add several IP addresses/ranges separated by space. Please note that it's important to add your private IP address to "ignoreip". If you for example changed the SSH port in Secure your VPS, and want to use [ssh-trap] jail, you will block yourself with fail2ban. That's because when you log in to your VPS with SSH for the first time, you must use port 22 before you can change it. Unless there is more than 24 hours between Secure your VPS step and Fail2Ban step, your IP address will be catched by ssh-trap filter and it will be blocked for 24 hours. If you plan to have several VPN users, add all the private IP addresses of these users to "ignoreip".
I use more restrictive settings than default settings: 1 day findtime, 1 day bantime, 1 failed attempt (maxretry) and banaction iptables-allports. I also use quite aggressive banaction. Any attacker will be banned from all services on the VPS, not just the service in question. The default settings can be overridden in the configuration section for each individual jail.
In this example I use seven different jails. Two predefined in fail2ban (sshd and recidive), and five custom jails (ssh-trap, over-ping-limit, over-syn-limit, softether-vpn-client and softether-vpn-admin). If you have changed the default SSH port to something else and are logging attempts to use port 22, you can use the [ssh-trap] jail to block the IP address of the attackers. Likewise, you can limit SYN flood (over-syn-limit jail), and bad ICMP requests (over-ping-limit jail).
fail2ban will load first jail.conf then jail.local. So in jail.local, you just need to add options that are different from jail.conf for the predefined jails, because all options in jail.local will override options in jail.conf.
Every jail has to have a filter associated with it. You will find filters in /etc/fail2ban/filter.d folder. Usually, the default filter has the same name as the jail name. For example the filter for [sshd] jail is /etc/fail2ban/filter.d/sshd.conf. For the custom jails (ssh-trap, over-ping-limit, over-syn-limit, softether-vpn-client and softether-vpn-admin) you will have to create new filters. Open a new file /etc/fail2ban/filter.d/ssh-trap.conf in a text editor.
sudo nano /etc/fail2ban/filter.d/ssh-trap.conf
Add the following lines inside it:
[INCLUDES]
before = common.conf
[Definition]
failregex = ^%(__prefix_line)sSSH_trap IN=eth0 OUT= MAC=(?:[a-f0-9]{2}){1}(?::[a-f0-9]{2}){13} SRC=<ADDR>
journalmatch = SYSLOG_IDENTIFIER=kernel
Press Ctrl x, then y and Enter to save the file.
Then, open another file /etc/fail2ban/filter.d/over-ping-limit.conf in a text editor.
sudo nano /etc/fail2ban/filter.d/over-ping-limit.conf
Add the following lines inside it:
[INCLUDES]
before = common.conf
[Definition]
failregex = ^%(__prefix_line)sOver_PING_limit IN=eth0 OUT= MAC=(?:[a-f0-9]{2}){1}(?::[a-f0-9]{2}){13} SRC=<ADDR>
journalmatch = SYSLOG_IDENTIFIER=kernel
Press Ctrl x, then y and Enter to save the file.
Then, open another file /etc/fail2ban/filter.d/over-syn-limit.conf in a text editor.
sudo nano /etc/fail2ban/filter.d/over-syn-limit.conf
Add the following lines inside it:
[INCLUDES]
before = common.conf
[Definition]
failregex = ^%(__prefix_line)sOver_SYN_limit IN=eth0 OUT= MAC=(?:[a-f0-9]{2}){1}(?::[a-f0-9]{2}){13} SRC=<ADDR>
journalmatch = SYSLOG_IDENTIFIER=kernel
Press Ctrl x, then y and Enter to save the file.
Replace "eth0" with your network interface in all three previous files. See Secure your VPS for an explanation of how to find the name of your network interface.
Then open another file /etc/fail2ban/filter.d/softether-vpn-client.conf in a text editor.
sudo nano /etc/fail2ban/filter.d/softether-vpn-client.conf
Add the following lines inside it:
[INCLUDES]
before = common.conf
[Definition]
failregex = ^\s*The <F-NOFAIL>connection</F-NOFAIL> "<F-MLFID>CID-\d+</F-MLFID>" \(IP address: <ADDR>,
^\s*Connection "<F-MLFID>CID-\d+</F-MLFID>": User authentication failed\.
Press Ctrl x, then y and Enter to save the file.
Then open another file /etc/fail2ban/filter.d/softether-vpn-admin.conf in a text editor.
sudo nano /etc/fail2ban/filter.d/softether-vpn-admin.conf
Add the following lines inside it:
[INCLUDES]
before = common.conf
[Definition]
failregex = ^\s*For the client \(IP address: <ADDR>, .* <F-NOFAIL>connection</F-NOFAIL> "<F-MLFID>CID-\d+</F-MLFID>" has been created\.
^\s*Connection "<F-MLFID>CID-\d+</F-MLFID>" .* "A client which is non-SoftEther VPN software has connected to the port\."
^\s*Connection "<F-MLFID>CID-\d+</F-MLFID>" .* Access has been denied
Press Ctrl x, then y and Enter to save the file.
In the [INCLUDES] section, you can include other files that are read before or after the lines in this file. In this example, the file common.conf is read in, and the content of common.conf is placed before the other lines in these files. This way we can configure some parameters that we will use in our configuration, for example %(__prefix_line)s. Then, in the [Definition] section we define a failregex that will match the error message. Finally, we can limit the messages in the log file to only include kernel messages (for ssh-trap, over-ping-limit and over-syn-limit jails), so that fail2ban doesn't need to process all the other lines.
The next jail is [softether-vpn-client]. If you want to use it, you must have chosen to log security logs in privacy hacks. The security log files are necessary for fail2ban to be able to use [softether-vpn-client] jail.
The next jail is [softether-vpn-admin]. If you want to use it, you must have chosen to log server logs in privacy hacks. The server log files are necessary for fail2ban to be able to use [softether-vpn-admin] jail. The failregex ^\s*Connection "<F-MLFID>CID-\d+</F-MLFID>" .* "A client which is non-SoftEther VPN software has connected to the port\." will match any non-SoftEther VPN client that connects to the respective port (the port you have opened for SoftEther VPN clients in Secure your VPS). That means that also "legitimate" clients like search engines will be blocked. I mean only SoftEther VPN clients should be allowed, and anything else should be blocked.
The last jail is [recidive]. This is a predefined jail that will block any attacker for a week, if they fail again within a week, after being blocked in any other jail. If you want to use [recidive] jail, you have to increase dbpurgeage option from 1d to at least 8d (8 days), so fail2ban can find failed attempts from the previous week, and also make sure the loglevel option is not DEBUG. If you have disabled IPv6 in Secure your VPS, you can disable IPv6 in fail2ban, as well. dbpurgeage and loglevel and allowipv6 options are defined in /etc/fail2ban/fail2ban.conf, but as with any other fail2ban configuration file you have to define them in a .local file. Open a new file /etc/fail2ban/fail2ban.local in a text editor.
sudo nano /etc/fail2ban/fail2ban.local
Add the following lines inside it:
[DEFAULT]
loglevel = INFO
dbpurgeage = 8d
allowipv6 = no
Press Ctrl x, then y and Enter to save the file.
Restart fail2ban to apply the new changes.
sudo systemctl restart fail2ban.service
There are two more things to mention about [softether-vpn-client] and [softether-vpn-admin] jails. Softether VPN logs are switched every day by default (at least in the version used in this tutorial - 4.44-9807-rtm). That means new log files (that looks like "sec_YYYYMMDD.log" and "vpn_YYYYMMDD.log") will be created every day, so after a while there will be many log files. However, if findtime for these jails is 1d (1 day), the jails require only log entries from the last 24 hours in order to find the newest failed attempts. Moreover, fail2ban loads the log files only at start up, so the newer log files are not loaded automatically. The solution is to create a script to find and delete all the log files except the last but one and the last one (depending on the time of the day, there can be 1 or 2 log files that cover 24 hours) for the respective jails and reload fail2ban afterwards, and then create a cron job to run the script every 5 minutes. Open a new file /root/softether-logs-delete in a text editor.
sudo nano /root/softether-logs-delete
Add the following lines inside it:
#!/bin/bash
# Delete security logs older than 24 hours.
HUBS=($(find /usr/local/softether/security_log/ -mindepth 1 -maxdepth 1 -type d))
for HUB in ${HUBS[@]}; do
  TOTAL_LOG_FILES=$(find $HUB/ -maxdepth 1 -type f | wc -l)
  if [ $TOTAL_LOG_FILES -gt 1 ]; then
    ALL_LOGS=($(find $HUB/ -maxdepth 1 -type f))
    LOGS_TO_KEEP=($(find $HUB/ -maxdepth 1 -type f -mtime 0))
    LOGS_TO_DELETE=($(echo ${ALL_LOGS[@]} ${LOGS_TO_KEEP[@]} | tr ' ' '\n' | sort | uniq -u))
    if [ ${#LOGS_TO_DELETE[@]} -gt 0 ]; then
      for LOG in ${LOGS_TO_DELETE[@]}; do
        unlink $LOG
      done
    fi
    unset ALL_LOGS LOGS_TO_KEEP LOGS_TO_DELETE LOG
  fi
  unset TOTAL_LOG_FILES
done

# Delete server logs older than 24 hours.
TOTAL_LOG_FILES=$(find /usr/local/softether/server_log/ -maxdepth 1 -type f | wc -l)
if [ $TOTAL_LOG_FILES -gt 1 ]; then
  ALL_LOGS=($(find /usr/local/softether/server_log/ -maxdepth 1 -type f))
  LOGS_TO_KEEP=($(find /usr/local/softether/server_log/ -maxdepth 1 -type f -mtime 0))
  LOGS_TO_DELETE=($(echo ${ALL_LOGS[@]} ${LOGS_TO_KEEP[@]} | tr ' ' '\n' | sort | uniq -u))
  if [ ${#LOGS_TO_DELETE[@]} -gt 0 ]; then
    for LOG in ${LOGS_TO_DELETE[@]}; do
      unlink $LOG
    done
  fi
fi

# Reload fail2ban service.
systemctl reload fail2ban.service
Press Ctrl x, then y and Enter to save the file.
Make the file /root/softether-logs-delete executable.
sudo chmod +x /root/softether-logs-delete
Now you can add a new cron job by editing crontab.
sudo crontab -e
Select a text editor.
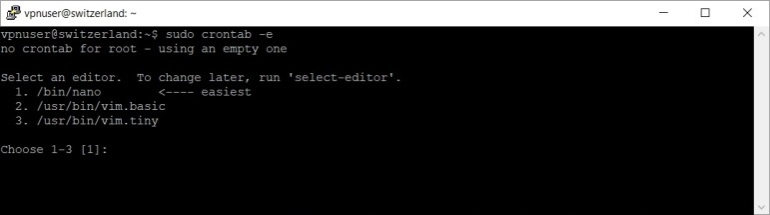
Press 1 to select nano, then press Enter.
Add the following line:
*/5 * * * * /bin/bash /root/softether-logs-delete > /dev/null 2>&1
Press Ctrl x, then y and Enter to save the file.
You should now reboot your VPS.
sudo reboot
As I said in the begining you can use one of my scripts to install and configure fail2ban automatically. Download the script first.
sudo wget -nv https://private-vpn-setup.com/downloads/fail2ban-setup
Then run the file fail2ban-setup.
sudo bash fail2ban-setup
If you use my script, you will find the cron job in /etc/cron.d/softether-logs-delete file. Should you wish to modify/delete the cron job, just modify/delete the file.